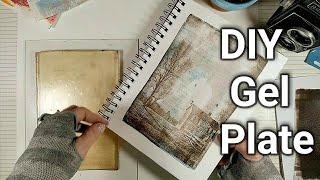
How to print photos with a DIY homemade gel plate
Комментарии:

So inspirational!
Ответить
May I ask what should be the proportion of the ingredients if I want to make a bigger gel plate ?
Ответить
Which kind of colour we can use for this print?acrolic or ink or oil colour?
Ответить
Great instruction video, I've learned lots and lots. Really helpful, well done. Thank you very much.
Ответить
I love your ideas... thanks so much for the inspiration.
Ответить
Super démonstration. Merci.
Ответить
do you have trouble with home made plate molding? I have seen several comments that has been a problem….wondering how to prevent.
you make it look so easy…

Fantastic thanks!!! ❤😂🎉
Ответить
Hi Nista! Great video and something I will be looking to try for my students! To make double the size, would I double up on the supplies used? Cheers
Ответить
can someone explain if we have to boil the agar ,i did not understand what needs to be boiled
Ответить
Hi, I have only just come across your videos and I love them. The measurements were for a 8x6 print, but would would the measurements be for an A4 and A3 print? Or will it be the same?
Ответить
Hi .. it didn't work for me 😢
Ответить
Thanks you. Your tutorials are excellent❤
Ответить
Hi, thanks for the interesting video! Can you advise as to how thick the gelli plate has to be on average? Thanking you in anticipation of a quick response!
Ответить
Hi Nitsa. Thanks for ths terrific recipe for gel plates and the great demos. I teach printmaking on a budget, so I'll give this a try. BTW, Agar agar is a seaweed product but oops, glycerin is an animal product (so it's only...almost vegan) :()
Ответить
Excellent tutorial and stumiing prints! Very inspirational! I have subscribed. Thank you for sharing this with us. 😀
Ответить
Thk u so much.I finally understood clearly!
Ответить
Thank you. I really enjoyed this video. I like the way you are straight to the point with no unnecessary chatter. His is the easiest demo for making a gell plate. Others have made it look so complicated I've subscribed and will certainly watch more. Thanks again.
Ответить
Just received my starter kit! Your video is like we're in the same room. Your voice keeps me calm.😊 Thanks for sharing
Ответить
terrific video; I learned something new; thank you :)
Ответить
What type of paper is your journal? How are you getting the pages to dry flat? Amazing work! Thank you for the inspiration. So mad at myself, I JUST got rid of a brayer I’ve had sitting here for more than 50 years doing nothing in a drawer.
Ответить
What a fantastic tutorial - thank you Nista
Ответить
This is inspiring
Ответить
Hi Nitsa. It’s Avram from Karmiel, here. I hope you are doing well and able to stay dry in LA with all that rain you folks have received. A question: my wife does a lot of furniture art along with other mixed media art projects. She is going to make her own gelli plate’s based on the instructions in this video to use along with stamping and stenciling. What is the best way to store them? What containers should be used and any other pertinent details would be appreciated. Many thanks and stay dry.
Ответить
2 teaspoons or 2 tablespoons of agar agar?
Ответить
I made a gel plate using knox gelatin it has an odor from the gelatin. I'm going to make one using agar agar. Thank you for sharing.
Ответить
What a great video! Love your instruction style. I needed this today, and will check out your classes! Thanks!
Ответить
I bought a gelli plate quite a while ago so I don’t need one at the moment, but if I ever want a second one I will definitely try yours out! Thanks for the tutorials!
Ответить
Beautiful work Nitsa
It is so inspiring.
But please ommit the background music , its annoying.....

Love everthing that you have done simple easy an creative wow big thumbs up geli plate here we go kk from nz cheers
Ответить
This is really nice. I particularly like the plate texture on the number image. It’s not so much a journal as a 1/1 artist’s book 😊Thanks!
Ответить
Hello!
¿What kind of paper do you use to transfer? ¿A glossy one?..toner printed in glossy paper? Because i try to do it in common paper and it doesn't result😢.
I absolutly love your sharing videos. Thank you so much.❤

If you use fabric paint, would it transfer to fabric?
Ответить
I love this! Thanks!
Ответить
Thank you this is so cool
Ответить
Amazing info. One question. So if I would like to make a bigger gel plate, like a4, then will that be double everything, like 4 spoons of agar agar, 1 cup glycerin and 2 cups of water and boil them together for 3-4 minutes? Thank you.
Ответить
Very nice, thank you
Ответить
Hello! Are you using two teaspoons or tablespoons of agar agar? Is it the same by weigh as the gelatin?
Ответить
Help too much scum on top can’t seem to remove it can you help? Thank you
Ответить
❤
Ответить
Superb👍what kind of paint you using on it? Thanks
Ответить
This was such a great tutorial video, wow the instruction was so easy to follow & the results from the technique amazing ! The gelli plate making demo again seemed so straightforward & the two options brilliant, before in videos I have watched the process seemed somehow more complicated. Thank you for sharing & teaching us about this!
Ответить
Beautiful work? Thank you! How do you get the printer to print the pictures out so dark ? What printer do you have? And what kind of brayer do you use? soft rubber?
Ответить
Hello Nitsa - I am having trouble with my gel plates - they fall apart. I have tried both the agar and the gelatin in the mix. I have better luck leaving them for 24 hours but they still tear. I am wondering if the room temperature has something to do with it or the type of glycerine? Any suggestions?
Ответить
how long does the gelli plate last? Does it mold?
Ответить
❤🧡💛💚
Ответить
New here, just bought my first gelli plate and then I hear a lady say homemade...I found you. Oh how wonderful you are! Thank you
Ответить
I absolutely love the final print. I am so going to do this process. Thank you for such simple instruction that produces a wonderful work of art.
Ответить
Love it but I want to ask.... you put the plate in the microwave or no ?!
Ответить