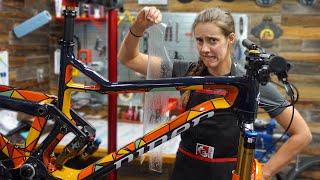
Protect your bike from rocks and scratches (RIDEWRAP FRAME PROTECTOR INSTALL) | Syd Fixes Bikes
Комментарии:

If this video was helpful and saved you time and/or money, consider supporting the channel by hitting the "Thanks" button above to leave a tip.
Ответить
Great video!
Ответить
You really have to practice with this stuff. The way I do it is plan to stick the middle of the piece first length wise work the middle out. The reason why is the more you stick and pull back to align the more chance of finger prints underneath messing with the adhesive not sticking (especially at edges) and bubbles that wont come out because the piece is now stretched. Another good reason is your smoothing the shortest distance for bubbles and solution extraction. For example... a rectangular piece that would cover a top tube. Wet both the piece and the tube thoroughly with solution till dripping. Place your piece over the top tube very lightly on top of the top tube center length to length for your piece and forward and aft for your top tube. Spray solution on top till running off. The top of your piece must be wet for your squeegee to work correctly. If too dry your squeegee will cause wrinkles. Run your squeegee just on top forward and aft just enough to stick and no bubbles. This part now that is sticking should only be about a 1/4 inch or 6mm from the front of your top tube to the back. Now start in the middle and hold out your piece but do not stretch the piece. Swipe with the squeegee in down strokes from the top to forward. Just do a down swipe that might only give you another half inch or so that sticks but work the line all the way one way....then go back to center go the other way till all is even. Then start over till that side is complete. Sometimes on a complicated piece I will cut it out but leave the backing on. Place on intended target and make alignment marks on both. That way I have a good start and not pulling off so many times. On big complex pieces sometimes I will make my marks, pull just a little of the backing, align, and proceed with taking the backing off a few inches at a time. Use a lot of solution. Hair dryers and heat guns both produce heat but are quite different. Dark colors show finger prints and imperfections more. Wow this is long.
Ответить
I have a really shiny chroma paint after I but the wrap on the older side has some dry smudges do you have that issues
Ответить
I was about to buy the tailored kit, and it just looks like so much work to install.
Ответить
To make this even more full proof, spray the bike as you apply the sticker
Ответить
Syd you do a great job. Tell the guy behind the camera to keep to his camera work. Your more capable than the VOICE makes you out to be. Keep on keeping on!!
Ответить
How long did it really take
Ответить
I'm about to give this a go myself. Thanks for showing this procedure..
Ответить
I just used 3m tape on my down tube, chain stays, and in the two places I strap a spare tube and water bottle to my bike. Seems to work fine. And some silicon detailer goes a long way to keep mud, dirt, snow slush, and other crud from sticking to my frame.
Ответить
Have you installed this protection on a carbon frame?
Ответить
These ride wrap kits look great. I've done similar with helicopter tape and do my own cuts and use a little dish soap and water in a spray bottle with a heat gun. Looks really good. I also wear disposable gloves when applying the tape too. Make sure I don't leave finger prints on the tape.
Ответить
Is this channel still doing videos?
Ответить
Parabéns minha amiga!😄🚲🔧🔧
Ответить
You're supposed to use the hair dryer to heat up the weird spots so they can form and move into place... after doing each piece.
Ответить
These kits suckk worse directions and stupid layouts
Ответить
Thanks for this.
Ответить
Can you give us an update on your single speed Niner please ?
Ответить
Air bubbles are an issue, but water bubbles can be safely ignored as they'll go away on their own over the next couple of weeks. It's also best to start squeegeeing from the middle of a piece out to each edge. Finally, with the edges that won't stick, use a dry paper towel to "wipe" the edge onto the frame and that will get most of the edge to stick.
Ответить
can you guys make Videos too about E-Bike? I'm E-Bike rider so I kinda want also to see some vids in your Channel.🇵🇭
Ответить
That solution gotta be baby shampoo i measure and cut from automative grade clear wrap comes out invisible. But pre-shaped wrap is way easier. Yeah baby shampoo mix somehow the preferred mixture. Also apply some mixture to your fingers to avoid fingerprints for the sticky side.
Ответить
Be sure to always keep your fingers wet with the spray solution. It'll keep it from sticking to your fingers or leaving fingerprints on the film.
Ответить
Yall have made several videos for how to fix things at home and also about what tools you put in your bags for aid stops at races, but how do you actually do any of the fixes and things you are talking about when on the side of the trail or road? what are those practical kinds of things to get you fixed enough and at least rolling home again?
Ответить
You guys are great and I genuinely love the vids, but the channel is also the dictionary definition of mansplaining :))
Ответить
Paint Protection Film (PPF) is used mainly on cars. The solution is just dish soap and you dilute it with water. My tip would be to not only spray the film but also the frame. The more solution the better. Once you get all the bubbles out use the heat gun and microfiber to finish the edge like you did.
Ответить
It's probably like window tint... You have to put the solution on both sides
Ответить
Just discovered your channel. Really good instruction on gear adjustment (past video). 'Love to see some videos on "old skool" rim brakes and other components.
Ответить
Why are my gear on my bike pooping
Ответить
Heyy what's your name please
Ответить
Took me 3-4 hours at least plus another day or two of obsessively popping and pressing bubbles out. I don't think I cleaned the bike I did nearly enough and it's peeling a bit now 4 months later in some of the more precarious spots (near the rear wheel well, bottom bracket area etc.) Mostly looks amazing and being able to change the finish of my bike to matte was amazing.
Ответить
I had the same experience when I first started my bike. By the end I had essentially no bubbles. It's a slow, tedious process, but looks great in the end if you take enough time.
Ответить
Omg where do I get my wife one of those nose manual kiss decals you have on your tool wall!?!?! I need it!
Ответить
Please make a vid cleaning the bike after a hard ride so we can see how well the wrap sheds the mud, dirt. Thanks.
Ответить
nicks and dents tell a story thou
Ответить
I love the 60 second summary at the end. Fantastic touch.
Ответить
Nice job- the wrap looks great on your bike. Ride wrap makes good stuff. I've used their 'covered' kits on a few frames and have been happy with them.
Ответить
I just did my first ride wrap about a week ago. Like you the first couple of pieces were a learning experience. I found using my fingers and the cloth after getting the entire piece in place was better than using the squeegee for removing bubble and extra solution. The more I soaked the pieces and the frame the easier placement was.
Ответить
In my experience, Ridewrap installation is like giving someone who has never made sushi, $200 worth of bluefin and telling them to make a perfect sushi roll. It's going to be frustrating, mistakes will be made, and in the end they will make something edible, but it isn't going to be pretty. Fortunately, some of the bubbles go away with time.
Ответить
I spray paint mine, been that way for 10 year and still looks good
Ответить
This must’ve been a tough process, judging by the amount of time it took you to edit/publish the video. haha
As always, great video. I think I’ll personally accept the rock chips as they happen, as I can see the lamination peeling over time and being another chore to peel it off…and leaving residue. Yes, please do a 6 mo / 1 year follow up!
Cheers from Italy!

Why don't bikes come wrap protected straight from the factory? Or does any brand offer it as an option?
Ответить
Really, your audience is 96% male? One of the things I love, love, love about this channel is that Syd (a woman!) is doing the mechanizing. Lots of appreciation for Macky too, but you just don’t see many female mechanics with this kind of following. Keep it up Syd! You’re inspiring me (also a woman) to start learning to work on my bike. Thanks a bunch!
Ответить
I just want to be friends with both of you.
Ответить
Looks great. My 1 minute wrap bike - give bike to Syd to wrap. Took all of 1 minute!
Ответить
I’ve used invisiframe on crank arms but wouldn’t try a frame wrap unless I had some help.
Ответить
alignment of the bigger parts has always been the most difficult part for me..trying to get that 3mm between pieces can be a nightmare
Ответить
I just put protection on vulnerable spots like the chainstays, Downtube, Seat tube, and where the front triangle connects to the rear.
Ответить
Very frustrating the bike shop tried to install a different product epic failure. That stuff looks way better. Thanks for your patience. DK
Ответить
imma guess that solution is soapy wooder
Ответить
Watching from PHILIPPINES
Love Cycling


