How to Create The Drop Shadow Using Path Blur in Photoshop
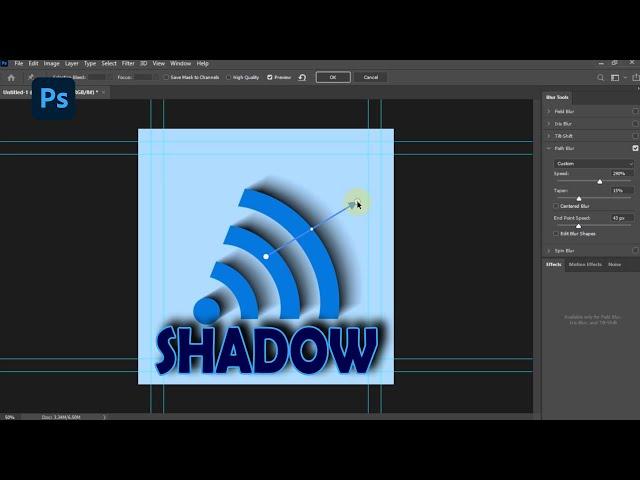
In this tutorial, I will tell you an easy way to create a shadow object using the Blur Gallery effect in Adobe Photoshop. Here I have inserted the image and background objects separately. The first step, right-click on the image layer. Then select Convert to Smart Object. Create a duplicate image layer.
Select the leyer image that is at the bottom. Go to the FX option. Then select Blending Option. Enable the Color Overlay option. Select Color Overlay to view its settings. Change the color section for the shadow. I chose the color black. The next step, go to Filters in the top Menu. Blur Gallery. Then select Path Blur.
Unchecklist Centered Blur setting. From the Path Blur settings, we can set the level of blur in the shadow through Speed and Taper. Set the values as required. To adjust the position of the shadow, drag the line for the Path Blur setting.
If you think it looks good, click Ok. And the result will be like this. Thank you for watching. And see you in another tutorial.
Musics by: Glass - Anno Domini Beats
For business inquiries: [email protected]
Тэги:
#TNO_TM #photoshop_tutorial #how_to_create_shadows_in_photoshop #photoshop #drop_shadow_using_path_blur_in_photoshop #drop_shadow_in_photoshop #create_shadow_in_photoshop #add_shadow_in_photoshop #how_to_create_shadow_in_photoshop #path_blur_in_photoshop_cc #how_to_use_path_blur_in_photoshop #adobe_photoshop #path_blur_photoshop #how_to_blur_background_in_photoshop #how_to_do_path_blur_in_photoshop #drop_shadow_using_path_blur_adobe_photoshopКомментарии:
Star Citizen - Gatac Railen
Texas Space Navy
AMC and GME update, CHANNELS !!
Infinite Gains
Volunteer in a Community Development Program in Palestine
The Excellence Center in Palestine and Germany

