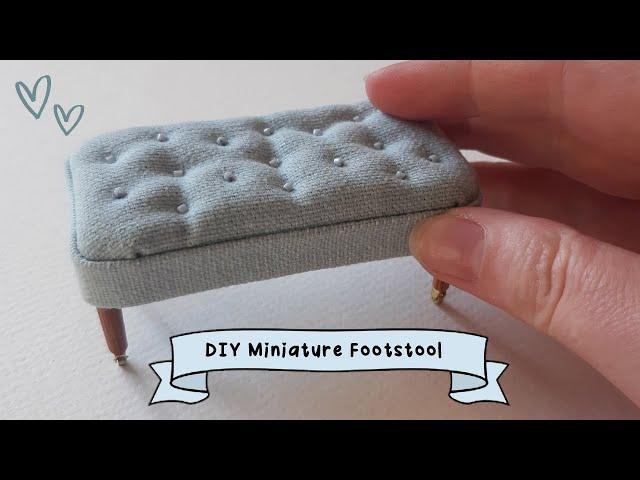
Miniature Upholstered Footstool Tutorial - DIY Dollhouse Furniture
Комментарии:

Wow!
Ответить
beautiful you have prettier chopsticks the we do
Ответить
Perfeito
Ответить
Beautiful.Looks so elegant 🥰
Ответить
Love the professional furniture techniques! Beautiful and very well explained! As a retired art teacher I’d give you an A+
Ответить
I love all of it, but I have to confess, those teensy wheels are amazing!
Ответить
This is an interesting bit of work. If you do a lot of this, you can go to a sporting goods store and get Ankle and wrist weights when they are on sale. While drying, you can use them as weights to hold the bottom and top pieces together. A flat lid from a deli sliced meat bin would hold the weights flat and in place. Good to see you provided the measurements as well. Always a big help.
Ответить
❤stunning omg
Ответить
Perfect! ❤
Ответить
Where do you get this kind of soft foam sheet?
Ответить
This is amazing! I bought a tiny piano from the thrift store, but it didn’t come with a piano stool. I’m going to try and make one using this tutorial. :) thank you for posting!
Ответить
А где такие колесики можно купить или это самодельные?
Ответить
А что ,нельзя какой-то другой клей взять,чтоб быстрей клеелось?
Ответить
Absolutely beautiful 🤩
Ответить
That came out beautifully!! Nice work!! ❤
Ответить
Omg those tiny wheels!! Wooden skewers (for barbecuing shish kebabs) are another good source of wood if it doesn't have to be very thick.
Ответить
Very cute like the mini castor wheels
Ответить
This is really lovely, I have this miniature monks bench/settle type thing and I think I will try to make a tufted cushion like you did because it really looks so much better and more realistic than ordinary upholstery❤
Ответить
I didn't got the scale. What was it?
Ответить
Nice tutorial. I love the background sounds, too!
Ответить
Beautiful!
Ответить
Your work is so good! I absolutely love the ideas you have shared! I make minature fairy homes and I do it cause it's as close as I will come to being able to play with toys and not feel immature about it. 😂😂😂
Ответить
You should Sign and Date the Bottom because it really is A+ Work of Art! ❤🎉
Ответить
Excellent
Ответить
Finally! A tutorial that doesn't rush through the process! 👏
I can actually understand every step without having to rewind the video several times.
Will definitely try this method in the future! 😊
Thank you! ❤❤❤

How cute this is. Thank you for sharing and have a great day
Ответить
This is amazing. Thank you for showing us. Where did you get the tiny wheel castors from please? 💕
Ответить
Amazing work!❤
Ответить
Another great tutorial.. you definitely have the skills now!! I'm a 70 yr old lover of miniatures. Started out when I was 10 making Barbie Doll, what is now called room boxes, with whatever I could find around the house.. things my Mom would throw out.. I esp loved her empty decorative cold cream jars from Avon. your little caster wheels here are so precious!! Another job very well done. Thank you so very much for sharing your talents with us ❤️❤️❤️
Ответить
I want to ask, where did you buy mini wheels? Can’t find
Ответить
Beautiful ❤❤❤❤❤
Ответить
So when you thread the first bead on do you go back through the same hole ?
Ответить
Thank you, excellent work while listening to some of my fav music!
Ответить
Really cute
Ответить
It is so beautiful wow 🥰
Ответить
Thank you for such a detailed tutorial!
Ответить
Very neat!
Ответить
119 K views
Ответить
Beautiful
Ответить
Remember to Subscribe
Ответить
Beautiful!
Ответить
Stunning. 💞
Ответить
I’ve just bought everything I’ll need to give this a go. It’ll be my first ever personally made miniature. I’m so excited to give this a try!
Ответить
The caster wheels were an awesome idea! Where on earth did you find them? 😮
Ответить
If you cut out a square at each corner of the material, the edges would sit flatter. Just FYI, I learned that from making the mini room kits 😊. Otherwise, great job! 👍 😊
Ответить
Fabulous ❤ do you ever use Beacons 3 in 1 glue or fabri tac?? They are fabulous for this kind of work😊
Ответить
Vídeo demorado e o mais importante fica fora do video
Ответить
❤
Ответить


