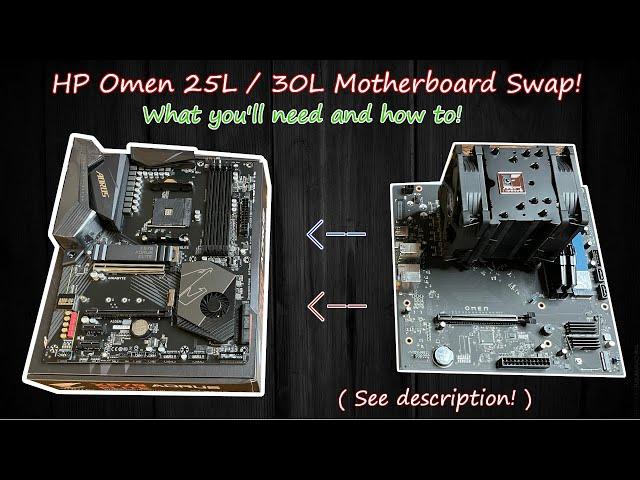
I swapped out my HP Omen motherboard! What you'll need and how to!
Hey guys, I am back with another video! I want to start off and apologize for not being able to show you how to swap the motherboard into the Omen case. Everything in this tutorial applies to swapping in another board in to your Omen though, except for you'll use a MICRO ATX for your swap!
First off, you will need 2 separate USB sticks that have at least 8GB of storage, copy these items onto them:
DO THESE STEPS BEFORE YOU INSTALL YOUR NEW MOTHERBOARD, WHILE YOU STILL HAVE A COMPUTER WITH INTERNET ACCESS:
USB Stick #1:
Download and install Windows 10 Installation Media:
https://www.microsoft.com/en-us/software-download/windows10
This USB stick will install windows on to your new motherboard so have this ready to go.
( NOTE: YOU CAN USE YOUR OMEN BOOT DRIVE IN YOUR NEW MOTHERBOARD )
USB Stick #2:
Google your motherboards applicable driver updates, download, and transfer them to your 2nd USB stick! So for my board:
https://www.gigabyte.com/Motherboard/X570-AORUS-ELITE-rev-10/support#support-dl-driver
And I downloaded these drivers:
1 ) BIOS
2 ) Audio
3 ) WIFI / LAN
4 ) Chipset
5 ) Utility
The main reason you want to have all your driver updates available on a USB stick before you transfer over all your motherboard components is because; occasionally when you first boot up your new board, without having the current WIFI or LAN driver, YOU MAY NOT HAVE INTERNET ACCESS and cannot download the necessary drivers to connect to your network. That is why I highly recommend doing while you have a functioning PC with internet access.
So after the swap, you'll want to plug in your Windows 10 Installation Media USB stick into one of the boards USB ports BEFORE you boot the computer. Your PC will recognize the USB stick and start to install Windows for you! You'll want to choose the hard-drive that you want Windows to be installed on and I ALWAYS recommend your boot drive be your fastest drive ( M.2 NVME usually ). Finish the install. Or you can select your Omen boot drive and bypass installing Windows.
At your desktop, your PC might do a few updates by itself, so you may have to restart a few times. After, grab your 2nd USB stick and transfer them to your PC and extract the files. Install ALL drivers.
Next up is going into your BIOS! For my board, upon restart, hit the DEL key until the BIOS comes up. Let's get your RAM speed correct! Go to:
1 ) Advanced mode
2 ) Tweaker Tab
3 ) XMP profile
4 ) Set XMP from Disabled to Profile 1
5 ) Save
You can take a look at some other settings in while in the BIOS, but none are really "necessary". You can set up a fan curve for all of your system fans but usually, the stock profiles work great but can be changed any time. Save and Exit the BIOS.
Verify your RAM is running at the proper speed, right click the Windows Start button and hit Task Manager. Go to the Performance tab and select Memory, and confirm that your RAM speed is proper speed.
Now if you have additional hard-drives, now is the time to set them up! We are going to do this by right clicking the the Windows Start menu and:
1 ) Clicking Disk Management
2 ) Clicking OK on the first screen
3 ) Your Boot drive will show up as a blue bar down below which means it's active and ready to go.
Any drives with a black bar will need to be setup by:
1 ) Right click the drive with the black bar
2 ) Click New Simple Volume
3 ) Hit OK on all the prompts
4 ) Choose your hard drive letter: ( A,B,D,E,F etc )
5 ) Rename your Volume
6 ) Click OK!
Your drive should now be BLUE and all drives are ready to go! Go ahead and close your disk management when all your drives are setup, and we are now going to make sure your monitor refresh rate is setup:
1 ) Windows Settings:
2 ) System
3 ) Display
4 ) Scroll Down and click "Advanced Display Settings"
5 ) Choose your monitor from the drop down menu at the top
6 ) Under the Refresh rate tab, choose the highest possible refresh rate available ( Mine is 144hz )
7 ) The Screen will flash and it'll ask you if you want to Keep these settings, click YES
After this, I would highly recommend downloading your graphics card drivers from Google ( Google your GPU name + driver update, so mine is "RX5700 Driver update" ), and install the software needed for your GPU and update the driver.
Other than all of this, you are now DONE WITH YOUR BUILD! Now you just have to install all of the programs that you use ( or transfer them over from an existing backup you have ).
Thank you guys SO much for watching the video! This video and description took me a LONG time to make so please drop a like rating if you enjoyed or found it useful! And please consider subscribing if you found this useful!
0:00 Intro
0:25 A Few Notes
3:05 What You'll Need
6:25 Upgrades
7:41 The Swap
23:12 First Boot
24:18 Installing Windows
26:07 Driver Updates
27:07 BIOS Adjustments
29:37 Hard-drive / Refresh Rate
32:08 Finished Product!
32:40 Final thoughts and Outro
Комментарии:
Pro Skills - Simplify 8-Ball / 9-Ball Patterns!
Zero-X Billiards
I'm the Tree of Wisdom
The Wiggles - Topic
5 BEST AI Photo Editing Apps for iPhones
iPhone Photography School
Early Islamic Era Explained: From Prophet Muhammad to Karbala
The History Hub
NEON BLADE (Super Slowed)
MadmiX


