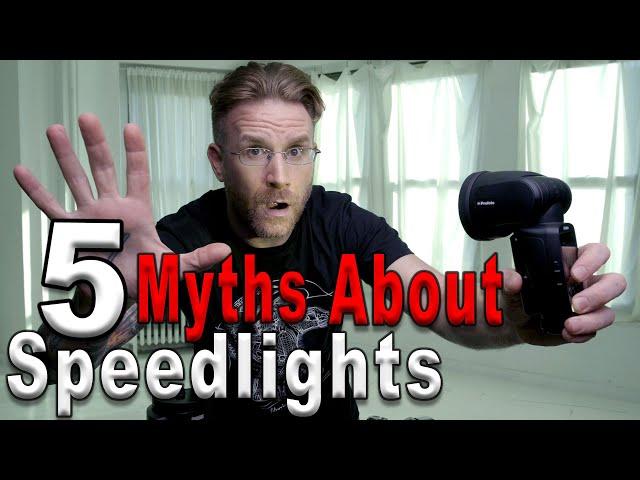
5 Myths About Speedlights / Small Flash
Комментарии:

love it Bro, though I believe you missed one advantage of speedlights, that limited power makes for the ability to apply just a kiss of light when needed, something monolights are unable to do easily
Ответить
great video. A great followup to this would be my top (insert number here) speed light modifiers.
Ответить
Enjoyed your talk - as a speedlite only guy Ive only used studio lights on a couple of occasions and have been considering many times inveting but my budget, small space, lack of storage, and the work im doing really doesnt need it i am able to produce the images I want, even from my budget Yongnuo speedlites I get grreat comments on the quality of light
Ответить
Yourself and Daniel got me into using strobes with your tutorials, and speedlights were a great way to get started without spending a lot of money up front. Great video as always 👍
Ответить
Thank you for making this video. Highly recommended for all beginner photographers. There is so much misinformation on social media these days. I have seen photographers knock out some amazing work using $60 speedlights.
Ответить
Excellent video Seth thanks!!
Ответить
I love the lithium ion batteries. I think that's the best way to go. It is worth getting an extra battery or something you can (I suppose that's possible) use to recharge from your car/power bank.
Ответить
Great explanation Seth!! I am going to start using my speed lights a bit more !!
Ответить
Did you use a green gel or led to color your video ??
Ответить
I'm headed BACK to using speedlights because they are lighter and unless I need HSS, they provide plenty of power.
Ответить
Well said!👍🏾
Ответить
That was very good, I have used lots of on camera flash and if I add it all up with batteries…..I spent a lot of money….even with recharging.
Ответить
I’ll never forget the first time I saw you bounce a flash from a handheld reflector (which I still constantly add and remove the Lastolite Halo to my cart). You and Daniel really show what speed lights can do!
Ответить
solid explanation as always!
Ответить
Speed lights are a tool. One of many , I quit a group because they were so against on camera flash. You use what you have. From a reflector to a wall to speed lights, to a studio light.
Ответить
Nice, Seth!
Ответить
I like them too
Ответить
great channel bro
Ответить
If its not working, its your fault.... love it!!
Ответить
Speed talking on speed lights :) And people think I'm talking fast hahaha.
Anyway: you're on point again. Back in the days I've worked with speed lights because there were nog battery powered studioflashes. Speed lights could do a lot, but there were drawbacks. Like as you mentioned the battery life. But the most I had against the speed lights were the menus. I am a Canon shooter and worked a lot with their top flashes, to change something was/is always a struggle. I hated it. The later Nikon flashes (I've bought the SB-900 at a time as off camera flash for my Canon) were better in the UI, but still not very user friendly. And the last thing I want is to puzzle with my equipment, I want to focus on my light/subject. So when I could I've invested in the Profoto system. Love the B2, B10, B1x. And then came the A1(x). It tackled all the big problems I had with speed lights. Less batteries to carry with me, very user friendly and it fits perfect in my system. I use it on camera (for reportages/news) as off camera (portraits) and it saved my pictures a couple of times.
The speed light isn't dead, it's alive and kickin'!

Great info as usual. Eh what is this weird thing you call the sun?
I have two Neewer flashes that I got for £80 from Amazon and it included the trigger and two recievers. Was on a shoot and a pro tog who had the top of the range Nikon ones said mine outflashed his and he went and got a set of four

Love your content, sir. I’ve accrued a bunch of speedlights; recently added some Flashpoint strobes. Always have a speedlight in the camera bag. Don’t ask a motorcycle to do what a pickup truck does 🤓👍
Ответить
I have come to your channel after seeing you with @MattIrwinPhotography and @RicciTalks. Thanks for sharing your thoughts on this subject. I was nodding in agreement with you for the whole video.
Ответить
The intro of this video always cracks me up bc I own one single low end strobe that I use only when I NEED another light. Speedlights are my go to
Ответить
The most amazing advice for me is first to utilize flash photography for my models, who I paint for my fine art drawings and paintings. You and Daniel are such a huge influence on me. Every painter should master flash photography and that is my goal one day.
Ответить
Thanks Seth, I subscribed today after watching your video on "Lastolite By Manfrotto" channel about Lighting subjects and backgrounds. Thanks a million for that video because you touched upon a very important and critical aspect of lighting; that is how to light background , which is something missing in many videos by celebrety photographers. Either they simply mention 'added a background light to light it up' or something like that but not the math behind it like how the distance from the subject affects, calculating power in relation with the key light etc. Thanks again for inspiring photographers like me to learn and grow through your informative videos. And this video is again very useful because I bought a Godox TT685 to start with for outdoor shoots, as you rightly mentioned it doesn't enough power to overpower sun at 1/8000 highspeed sync (Even at full power) but quite adequate to use under shadow areas like under a tree or a building etc. I would have loved to see your take on Godox AD100 but you don't seem use Godox products or Flashpoint . Love from India.
Ответить
Good stuff Seth. Can you please do a video on your favorite or go to modifiers for speedlites ?
Ответить
I have the eneloops with external pack Your right costs a bit and a pain to make sure they are all charged before a shoot .These new flashes with these compact batteries are a real game changer too .
Ответить
Unfortunately of what you use I can only afford that awesome Alien/Predator T Shirt (Real Cool). New to your channel but have seen you as a guest on others that I follow, I need to watch some of your other videos with speed lights. A general question do you use your speed lights in TTL mode and just adjust the power output from one flash to the other or do you set everything up in manual mode, also what brand speed lights have a modeling light capability to preview your results.
Ответить
wish more people in the community will watch this video
Ответить
Legend!
Ответить
I have become a BIG Seth fan. I can't afford the fancy lights he & Daniel have, BUT cheap old flashes work just fine for cheapskate amateurs like me. I have SB-800s for TTL, super cheap Yongnuo 560Mk3 manual power speedlites for radio triggering for location. Also, I have old Elinchrom Style 600S & 300S mains strobes for my home studio. My Elinchroms were all under £100 U.K. each. They will recycle almost instantaneously all day long, they were once premium models & are built like tanks and they are super easy to use. I even have the matching Elinchrom analogue cable remote units for them. (useful when the strobes are up at ceiling level.)😃
Ответить
Glad you give props to on camera flash. I shot for years fashion, and would get a lot of request for ring flash and on camera flash. It brings the viewer right into the picture. I love running a grid and backlighting a couple of speed lights. Profoto definitely has the best speed lights out there.
Ответить
I bought a bunch of Nikon SB80DX speedlights about 8 to 10 years ago. Each was about 70,- Euros or something crazy like that and I only use them strobist style. These things are great and outright refuse to die. They can be fired on center pin, have a sync port and optical slave. I have them running on eneloops that are in some cases almost as old as the flashes. I wouldn't use them as main lights all the time but as a kicker, a splash of color, hidden in the back or in a lamp ... Speedlights are awesome! Everyone should have a few.
Ответить
Just the fact that profoto is on their third iteration of speedlights shows their “pop”-ularity! (<—see what I did there! 😂)
Ответить
Thank you for the video, I know it was posted one year ago and I am commenting now in Oct 2022. I bought a demo Profoto A1 for $500 just to try it and see if would later buy the A10, I am fully convince that is a much better speed light than the Godox A1 and the light is beautiful all day long in a wedding, it never changes the tone. So I am ready to invest more in the Profoto line 😁
Ответить
I "don't like" speedlights because I can't use them properly and can't really seem to grasp how to use them the right way
Ответить
In 2023, I've just got a Godox TT350s for my SonyA6000 off Amazon UK Its tiny. It has a guide number of 35. I can be used as a master or slave. It has 3 modes TTL, Full manual and Multi strobe. HSS up to 1/8000, zoom head 24 to 105mm. The usual pull out diffuser and bounce card, which drops the the zoom to 14mm. Full flash head moment. 180 degrees, front to back, then 270, around to the left. It comes with a diffuser protective cap case and flash stand. It cost £70 posted
Ответить
Having the right tool for the right job is alway the way to go. Flexible ways to have light you might need is knowing the you have in your bag just I case. Nice job Seth. 2 thumbs ☝
Ответить
Good video, once I started using my speedlights off camera with modifiers I realized I did not need studio strobes. They are more powerful than what you would think, compact and versatile.
Ответить
Another thing people often overlook is zooming a speedlight. I'm always baffled when I'm at an event, zoom the flash, and then take a shot @ 200mm.
Ответить
I really enjoy your videos You're a great guy with an awesome personality. I just started to get back into photography I bought an icon Z9 and I bought a goadox AD600 and an AD200 and now I'm addicted and I also bought another AD600. Now I am going crazy and have gear acquisition syndrome and I'm buying all types of different modifiers. Would love to come over to your studio and pick pick up some Brooklyn reflectors. 😊. Thanks so much for sharing all of your experience with photography You're helping so many like me I also bought one c-stand after watching your video and then bought a second one but now I think my credit card needs a break. 😊😊
Ответить
Great Video!
Ответить
Hi Seth, thanks for all the great videos. I have the Halo. What are you using to connect it to the stand? And the flash as well? Thanks.
Ответить
I bought Godox' cheapest speedlite the TT520II. I'm blown away by the value of this is given that at about 30 dollars (1,800 pesos here in the Philippines), it comes with a wireless transmitter straight out the box. So you can start delving in off-camera flash immediately. It wasn't possible to buy something like this 5 years ago! I own two now and I use them side by side with my studio strobes.
Ответить
I had the good fortune to get my first photography job in 1972 assisting the Monte Zucker, the photographer who introduced using dual flash “speedlights” for weddings in a very well thought out systematic approach in which one Graflex flash head was attached via a bracket with center of flash head about 16” above the lens for Fill and an identical photo-cell triggered Graflex flash was mounted on a rolling modified medical IV pole and used as Key light.
One of primary technical goals in wedding and event photography is to record a full range of tonal detail from the beadwork on the bride dress to the folds in the groom tux A key over fill lighting pattern makes it possible to record the full tonal range by controlling the key: fill lighting ratio. With the negative film we were using a ratio in which key was one f/stop brighter than the fill produced a full range print. That is a 2 key : 1 key (2:1) incident and 2 key + 1 fill : 1 fill (3:1) reflected lighting ratio. For a “softer” look key and fill would be used at the same distance/strength for a 1:1 incident / 2:1 reflected ratio with key light overlapping the centered “neutral” (creating no shadows) fill.
We used fixed focal length cameras which required changing shooting distances for different crops. Because of the inverse square law the intensity of flash changes distance similar to how f/stop number increments change exposure. Realizing this Monte devised a simple system for adjusting exposure with flash simple: systematically shooting the various crops from 16, 11, 8, and 5.6 feet. Moving from 11 to 8 feet we would also close the aperture, which had click stops, from f/8 to f/11 to keep the flash exposure the consistent.
Lighting ratio between the Fill light on the bracket over the camera and Key light on the stand was also controlled by distance using the inverse-square law. If shooting from 11ft the key light would be placed 8ft from the center of faces. If moving into 8ft for a tighter crop the off camera flash would be rolled to 5.6 ft (distances estimated by eye, paces and experience) with aperture closed an f/stop to maintain the same exposure and 3:1 “as seen by eye” reflected ratio. It sounds complicated but it only required remembering four aperture and key light distances settings for shooting from 16, 11, 8 and 5.6 feet for the various crops. If shooting from 11ft placing the key light on the rolling stand at 8ft produced the desired 2:1 incident key:fill ratio which because of how key overlaps fill is a 1 fill + 1 key : 1 fill = 3:1 reflected ratio.
The aesthetic goal in wedding and event photography is flattering the subjects and Monte did that by capturing precise facial angles — full face / oblique / clean profile — with “short” i.e. Rembrandt pattern created very easily by placing the off camera flash on the rolling stand so it was 45° to the far side of the nose and 35-40° above the eyes while shooting “candid” photos of wedding ceremony and reception events. Flash wasn’t used during the ceremony but posed on the altar afterwards along with wedding party group photos. My first job as his assistant was moving around the key light based the angle to the faces and the distance he was shooting from.
A mistake most beginners with artificial lighting make is the placement of the fill. Part of what mades artificial lighting natural looking is that it duplicates the shadow patterns and shadow values perceived by eye in natural light which has ONE sun and causes the nose and other facial features to case ONE shadow with the reflected sunlight from the sky creating wrap around fill.
The noob assumption that fill needs to be placed on the opposite side from the key light creates a pattern of two crossed shadows from the nose and areas on the face like the mouth and smile lines where fill light gets shaded causing very dark and distracting shadow voids on the face. Placing the fill on the camera axis and above the lens causes the shadow the fill flash creates to fall down out of sight of the camera lens which eliminates those dark unfilled areas. Creating the illusion of “hard” and “soft” in with a lighting pattern is primarily a function of how light or dark the shadows are made via the lighting ratio. If wanting a “softer” look with flash moving key and fill to the same distance from the face (1:1 incident / 2:1 reflected) will make the lighting perceptually softer in both the shadows and the highlight-to-shadow transitions even with direct unmodified flash.
The main benefit of adding diffusion to speed lights is that it changes the character of the specular reflections faces — something mentioned here — which are one of the clues the brain uses when deciding how “hard” vs “soft” or “natural” vs “artificial. The position of the specular highlights on 3D objects is also a clue the brain uses to determine if lighting is “natural” or “artificial”. Flash on camera looks artificial because the specular reflections it creates are very near the camera axis. That is the reason for using a flash bracket to raise the fill flash. That is done not only to create a downward pattern of shadows but more importantly to put the specular highlights the flash creates occur higher (and more naturally) on faces and all other 3D objects.
There’s no rule which dictates lights must always be placed that way but if the goal is a natural appearance of faces and other objects logically you want the artificial sources to cast their shadows and create their specular lights similar to natural lighting: never seeing a fill source shadow and having the key light hit objects from a downward angle of around 45°.
When I switched to Canon E-TTL flash in 2005 I used the same techniques from light placement — bracket and rolling stand — and found the same 3:1 reflected ratio produced a full range of tone, but since the A group was Master and Fill the Master / Slave ratio setting needed to be A:B = 1:3 or 1:2 when wanting a perceptually softer look. I did a lot of experimenting with DIY flash diffusers and found that for event shooting the most practical one was a scoop style reflector created with sheets “fun foam” and I taught others how to make them on photo forums in the mid- 2000s. As noted the greatest benefit of adding a small diffuser to a speed light isn’t diffusion of the shadows but rather making the specular highlight clues more diffuse and “softer” looking.

Spot On !!
Ответить
Love my speedlights
Ответить
I first started bouncing my tt600 taking pictures of the kids inside. Some of the best photos I’d taken at the time. Now I wish I’d gotten one with ttl lol
Ответить
![Thoorpu Padamara Video Song [4K] | Natyam | Chinmayi Sripada | Sandhya Raju, Rohit Behal | Revanth Thoorpu Padamara Video Song [4K] | Natyam | Chinmayi Sripada | Sandhya Raju, Rohit Behal | Revanth](https://ruvideo.cc/img/upload/OHBxWmxoYS1hM1E.jpg)





![[FANCAM] 241121 트와이스 TWICE Amazon Music Live "Talk That Talk" + Ending [FANCAM] 241121 트와이스 TWICE Amazon Music Live "Talk That Talk" + Ending](https://ruvideo.cc/img/upload/RUlsVzh4X1JwY0Q.jpg)
