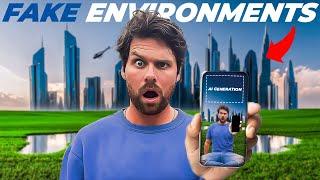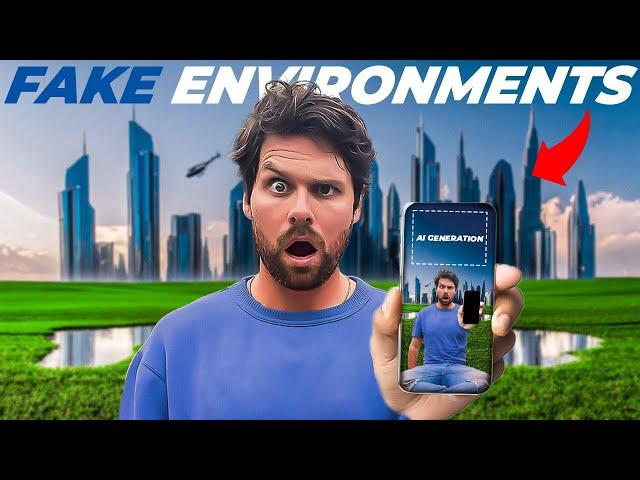
3 NEW WAYS To USE PHOTOSHOP AI VIDEO EFFECTS In Your NEXT EDIT
https://brevite.co/JustinSerran - Visit For Your Chance To Win a Free Camera Backpack From Brevite
My (Super Affordable) EDITING PRESETS: https://justinserran.gumroad.com/
In Today's Video I'm showing you 3 new ways you can use Premiere Pro, and Photoshop Beta, to create AI Video Effects in your next video edit.
METHOD 1 - CHANGING LOCATION
Import your clip of choice into a Premiere Pro SEQUENCE
Bring Your Playhead To The Moment you want the location change to take place. If you want it to be the entire clip, then leave your playhead at the start of your timeline.
Hit This Export Frame Camera Icon, and Save the Image as a TIFF FILE
Now Open That Saved Tiff File in Photoshop BETA
Select the LEFT SIDE of your IMAGE With The Rectangle Marquee Tool
Then Enter Your Prompt and hit Generate
Filter Through The Results Until Your Happy, Then Repeat This Step With The Right Side of The Frame
Additionally, we can use the lasso tool to make custom selections that can then be used to add individual items to your image.
Now save your photo as a Photoshop PSD File.
Import That Photoshop File Into your PREMIERE PRO Timeline, on the layer above your Raw Clip, And Stretch Out The length as Needed…
Now with the PSD Layer Selected, Go Up To Your Effects Controls, And Under Opacity, Select The Pen Tool, and Create a Mask Around Your Subject Like So, Making Sure To Avoid Anywhere The Subject May Overlap.
INCREASE THE MASK FEATHER AS NEEDED to BLEND THE TWO IMAGES
Now Hit Invert, To Invert The Mask Selection. Now We’re Left with the Outside of the frame as our AI Generated Image, and our subject masked nicely in the middle.
Finally we can nest these two clips together, and animate them as if it were one clip.
Also, it’s worth mentioning that since we imported the Photoshop Files, we can update our AI GENERATION in PHOTOSHOP, SAVE THE RESULTS, and It will AUTO UPDATE in PREMIERE PRO.
METHOD 2 - LIMITLESS ZOOM
Similarly to method 1 we will Hit EXPORT FRAME In Our Premiere Pro Timeline Where We Want The Effect To Take Place.
Next, we can open that Exported Frame In Photoshop BETA, and select the CROP TOOL.
From Here, We Can Double The Size of Our Sequence. It helps to click and drag until your reference frame, fits perfectly within the top centre square of your composition lines, and then repositioning it in the centre of the canvas.
HIT REMOVE BACKGROUND TO REMOVE THE WHITE DEFAULT BG
Now using your rectangle marquee tool, select the majority of your image, with just a slight border unselected like so.
Now in this Generative Fill Menu, hit invert selection to select the empty space around our image.
Hit Generative fill, add the prompt “extend the landscape” and hit Generate.
Now Choose your favourite result, before Saving The Photoshop Project as a PSD File.
Import That PSD Into your PREMIERE PRO Timeline, on the layer above your Raw Clip, And Stretch Out The length as Needed…
Now The PSD FILE Should Line Up Properly With The Framing of Your RAW CLIP.
Set Both The ORIGINAL CLIP and AI GENERATED REFERENCE FRAME to 50% SCALE, and Make Sure They Line Up Perfectly…
Decrease The Opacity to 50% or lower if you need, to make sure the two assets are lined up.
Now With The TOP LAYER Selected, We Can Use Our Opacity Pen Tool, To CREATE a Mask Around Our Subject, so the video layer below is visible
Hit Invert To Invert The Mask Selection
INCREASE THE MASK FEATHER AS NEEDED
Next We Can NEST both Clips Together, and animate our scale and position, to go from our original framing, and zoom out to limitless lengths
AM I BLOWING YOUR MIND YET OR WHAT?! *PURPOSEFULLY CORNY*
METHOD 3 - HORIZONTAL TO VERTICAL FOR SOCIAL MEDIA
Like our first two methods we will start by exporting a frame from our timeline in Premiere Pr
Open That EXPORTED FRAME in PHOTOSHOP BETA
USING the CROP TOOL, CROP THE CANVAS to 9x16 VERTICAL DIMENSIONS
Now CENTER The REFERENCE FRAME
With Our Rectangle Marquee Tool We Can Select The EMPTY TOP Portion of the Frame
Hit GENERATIVE FILL, ADD A PROMPT LIKE “EXTEND THE SKY”, and HIT GENERATE
Pick Your Favourite Result, and repeat that process on the empty BOTTOM SECTION of our FRAME
Once Happy With Our RESULTS, WE Can Save That as a PSD File, and IMPORT IT Back into Our Premiere Pro Timeline
Now Set Up a Vertical 9x16 Dimension Sequence In PREMIERE With Our Original Horizontal Clip Fit To The Centre of The Frame Like THIS…
Then ADD Our NEW PSD File on The LAYER ABOVE
And Repeat Our Masking and NESTING Steps From Method 1 & 2, and we’re all set!
FOLLOW ME:
Tik Tok: Justin Serran
Instagram: Justin Serran
www.visualblvd.com
Follow for daily premiere pro tips, tricks, and hacks!
CHAPTERS:
0:00 - INTRO / EFFECTS EXAMPLE
0:26 - TUTORIAL INTRO / DOWNLOAD PHOTOSHOP BETA
0:49 - METHOD 1 - CHANGING LOCATION
2:18 - METHOD 2 - LIMITLESS ZOOM
3:47 - SPONSORED SEGMENT
4:01 - METHOD 3 - HORIZONTAL TO VERTICAL FOR SOCIAL MEDIA
4:48 - OUTRO
Тэги:
#3_NEW_WAYS_To_USE_PHOTOSHOP_AI_VIDEO_EFFECTS_In_Your_NEXT_EDIT #AI_GENERATED_ENVIRONMENTS_on_VIDEO #Premiere_Pro #Photoshop_Generative_Fill #Photoshop_AI_Generative_Fill #Photoshop_AI #Premiere_Pro_Tutorials #Fake_Environments #Premiere_Pro_+_Photoshop_AI_Generative_Fill #photoshop_tutorial #photoshop_generative_fill_tutorial #how_to_use_generative_fill_photoshop #generative_fill_for_video #generative_fill_tutorial #generative_fill_premiere_pro #AI_for_video #premiere_pro_aiКомментарии:
Sławomir Morawski - Katar na okrągło - magazyn MŚ
Asysta - Magazyn Piłkarski
PETITTI Boxwood | Grow for Deer Resistance & Evergreen Color
Petitti Garden Centers
I'm Just No Doubt
Italyanboy
Jamaican Jerk Chicken Cheese Steak Sandwich!
Feed & Teach
Welcome To The Most Dangerous City In Texas, America
The Taboo Room With Aaron S
